In this article, you learn how to promote your consulting services by highlighting skills on your url.live profile page.
Opening the skills page
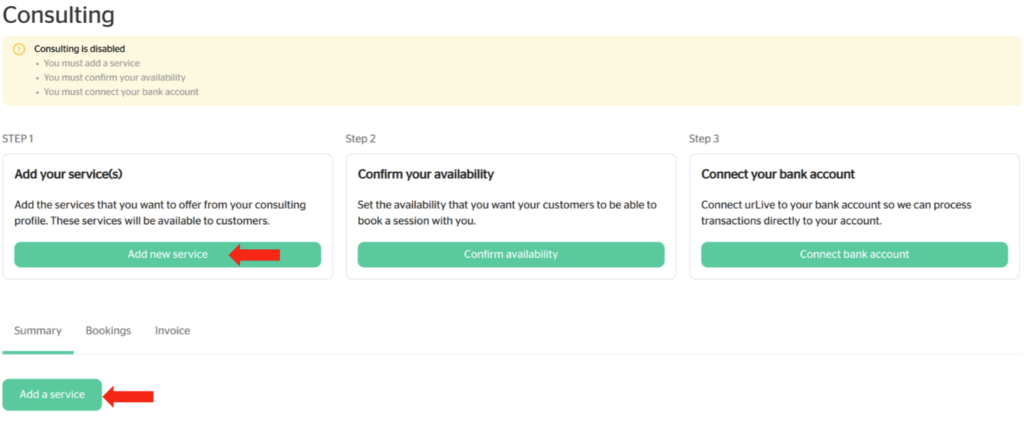
1. On the main page, click the Settings icon and select Consulting Dashboard.

- Click the Add a service (or the Add new service) button
Adding a Service under $50/hour
Services under $50/hour do not need to be approved. All you need to do to add the service, and it will appear in the Summary tab of your consulting dashboard (once your availability has been set and you bank account has been connected).
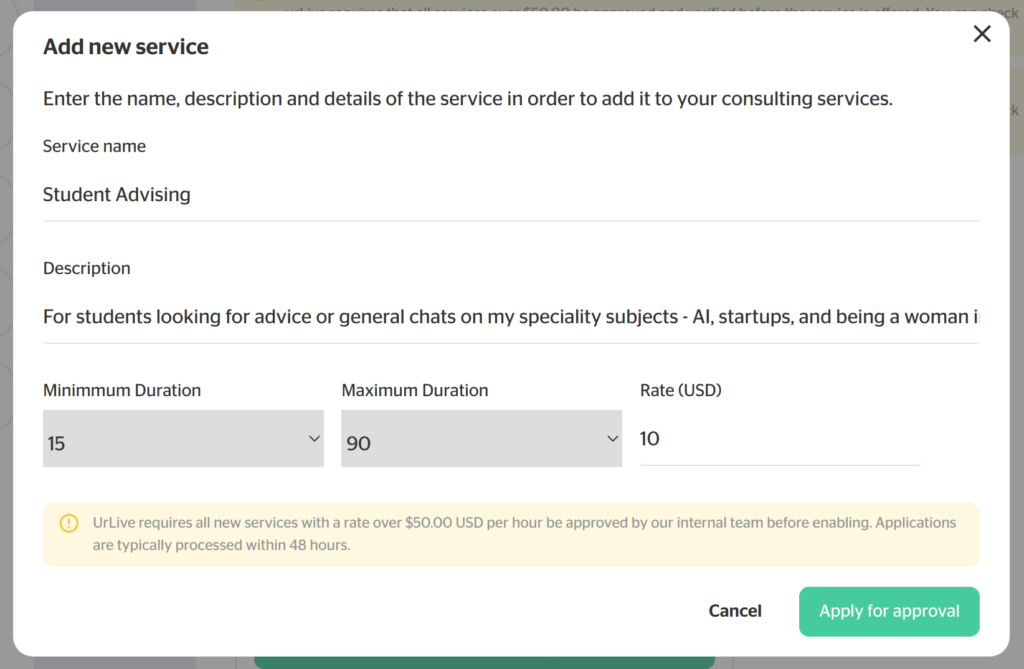
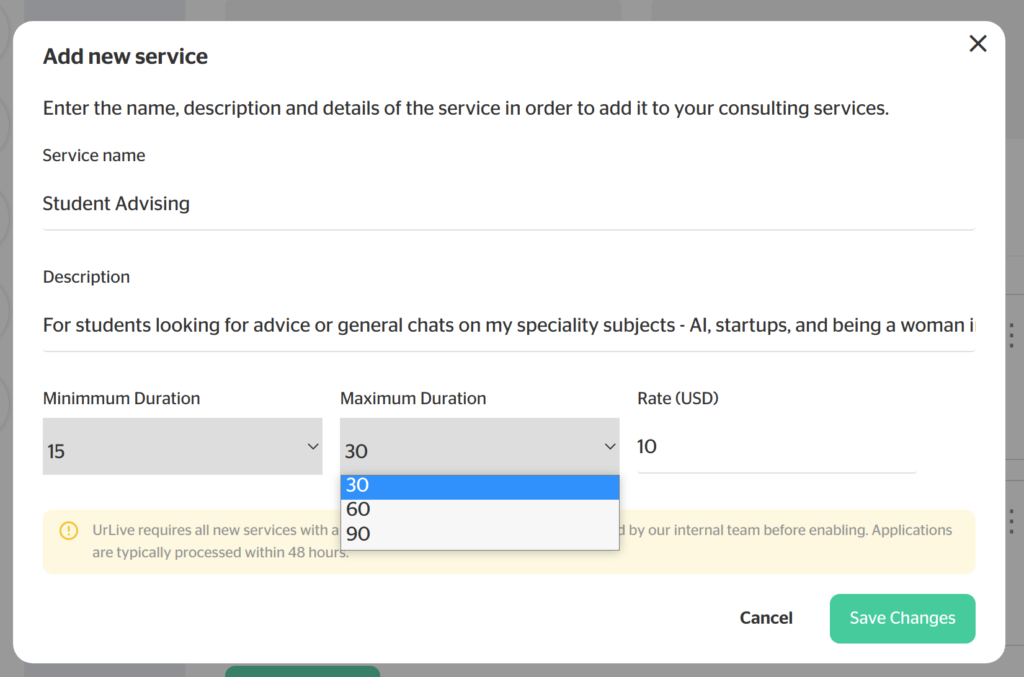
An example service is presented below. In this scenario, a Professor Kim Li has decided to set up a $10/hour service where students can get advice from her on her speciality subjects. Once she fills out her service information, she clicks the Apply for Approval button.
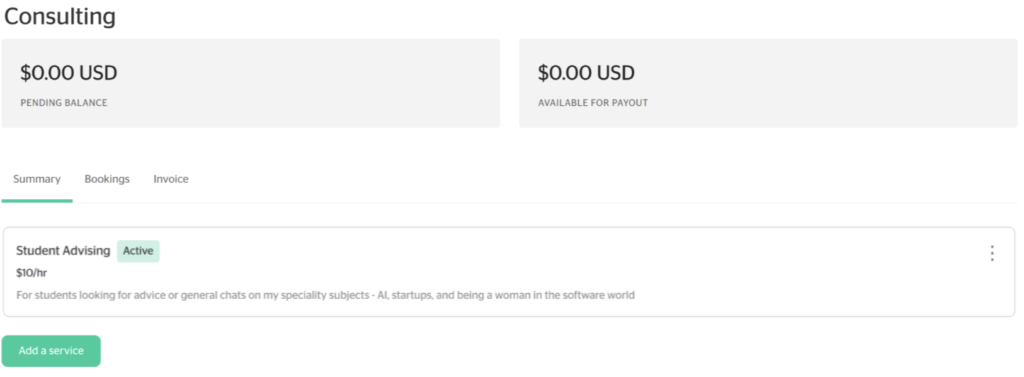
Once she clicks the Apply for Approval button, the new service appears as Active in the Summary tab of her consulting dashboard.
Adding a Service over $50/hour
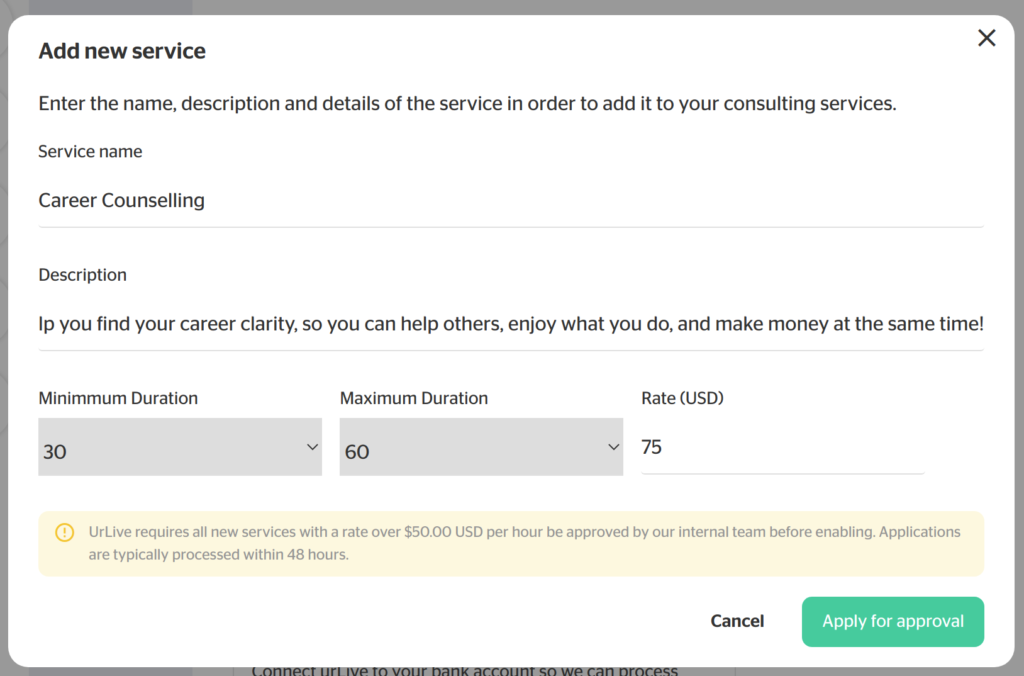
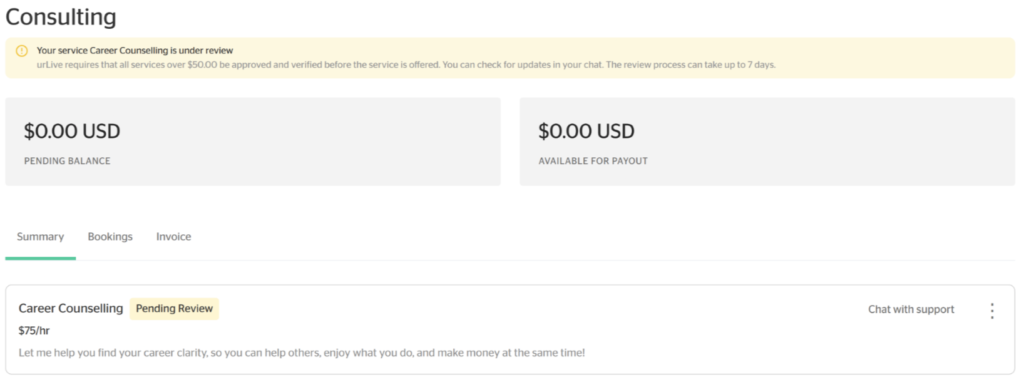
Services over $50/hour must be approved. To begin the approval process, enter a consulting service with a rate at or above $50. An example service is presented below. In this scenario, we return to professor Kim Li. Before becoming a professor, she was a successful startup owner. Professor Li has decided to set up a $75/hour service where she can give career counselling to people in her field. Once she fills out her service information, she clicks the Apply for Approval button.
Once she clicks the Apply for Approval button, the new service appears as Pending Review in the Summary tab of her consulting dashboard, and a flag appears at the top of the consulting dashboard reminding her that this service is under review.
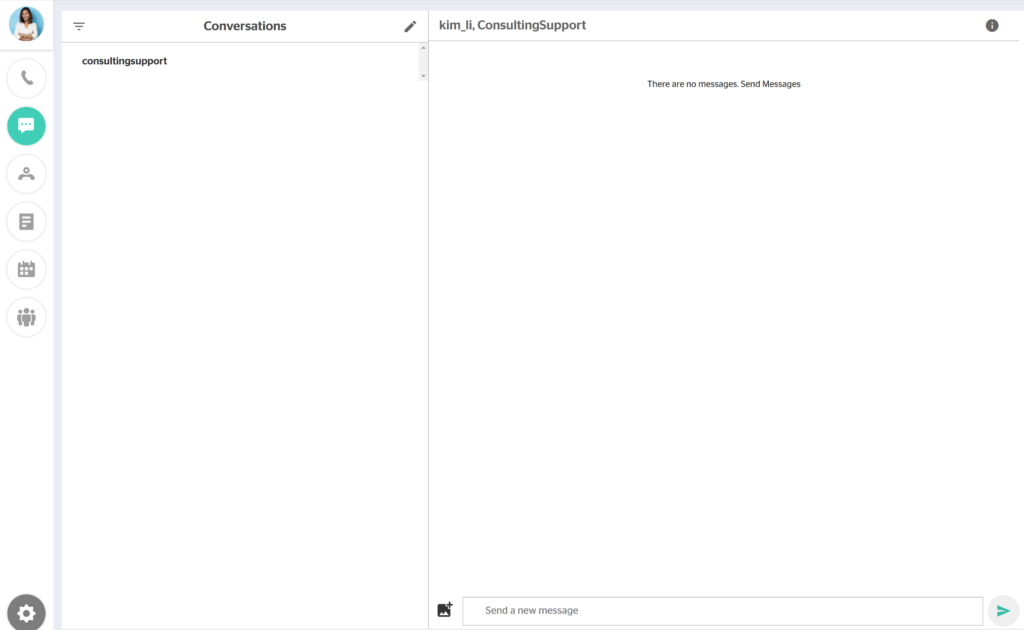
The next step in the review process is to click the Chat with support button beside the pending service.

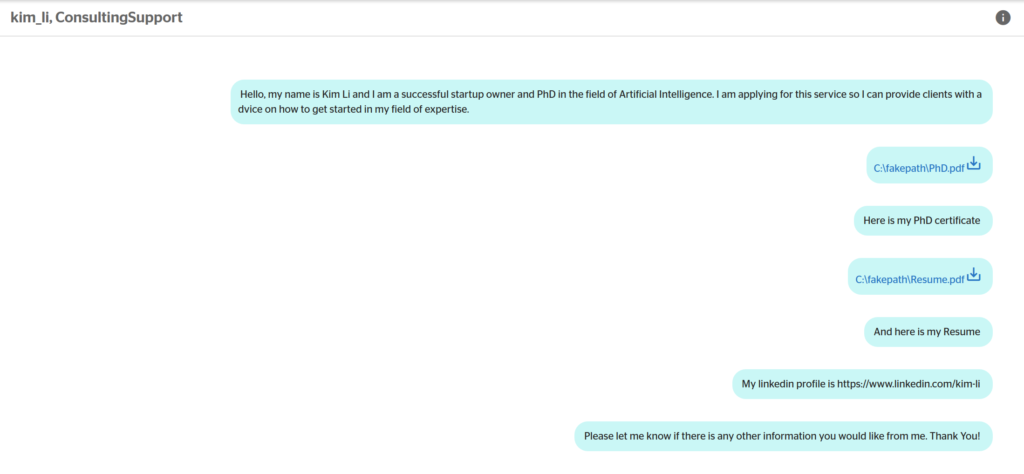
This will open up an IM chat window urLive’s with Consulting Support team. These are the people in charge of approving your service.
In order to get approved, you must prove that you have the credentials necessary to charge for the service you are offering. In this example, Professor Li gives a short explanation of what she intends to provide to clients through this service, and why she is qualified to do this.
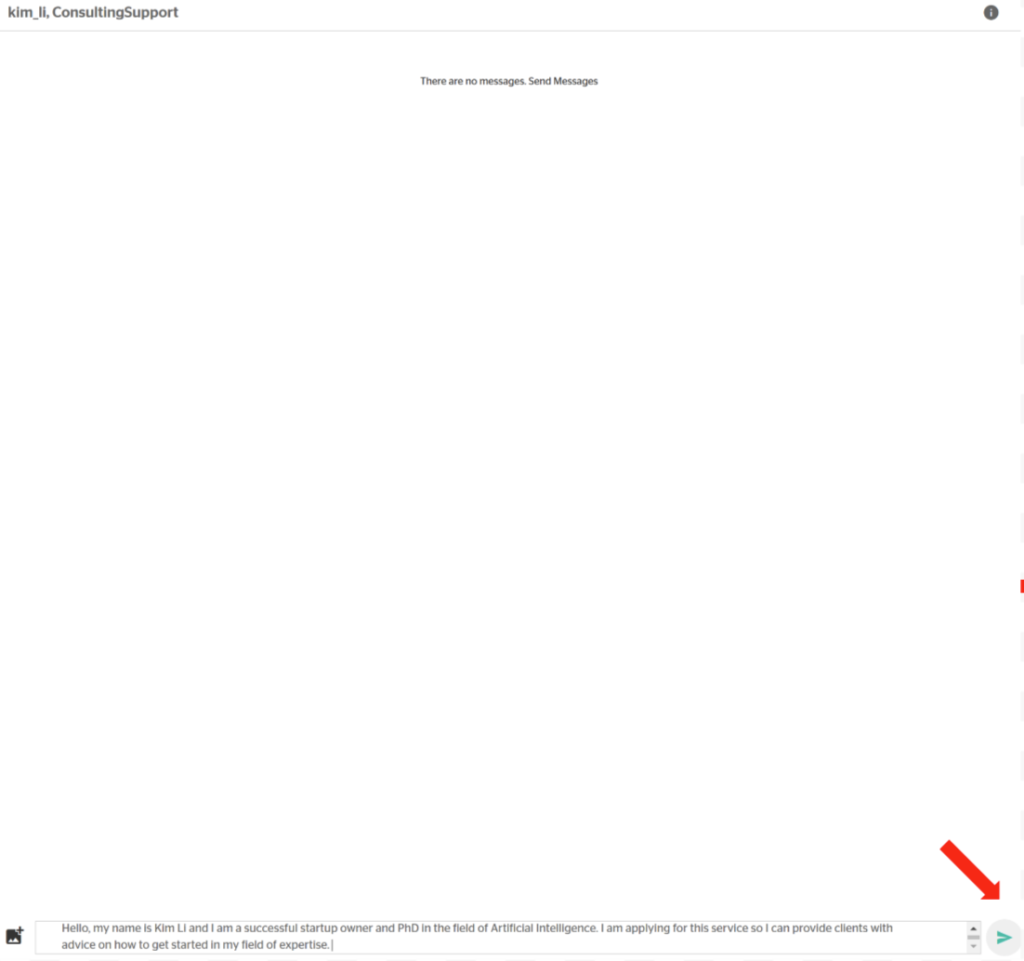
Next, she then some supporting documents to back up her explanation.
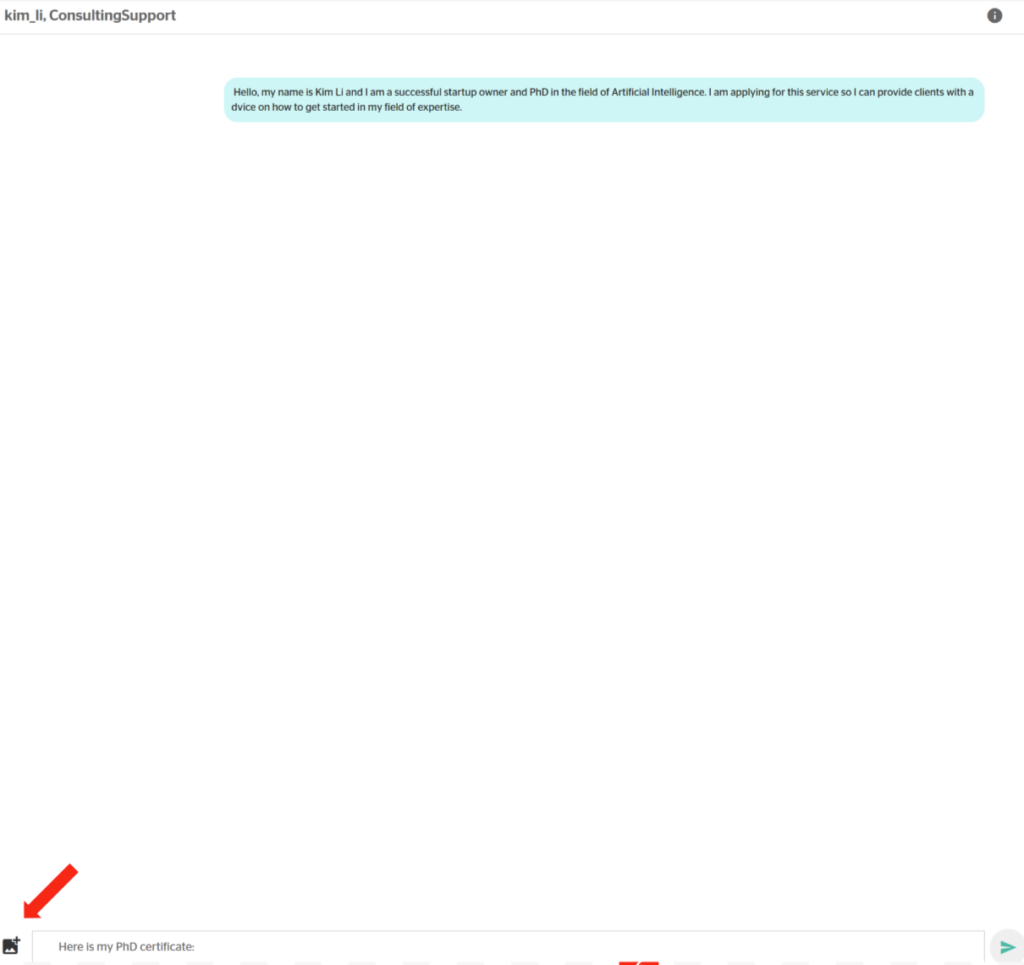
Once she has sent her information, Kim waits for a reply from Consulting Support. This may take a few days, depending on the volume of applications currently in progress.
Editing a service
To edit a service, go to the Summary tab of your Consulting Dashboard, click the ellipsis (…) next to the service’s name, and click Edit Service.

Clicking this will open the same window in which the service as set up. You can change any of the information you entered originally. Note that if you change the rate to $50 or above on a service that was previously below $50, that service will need to be approved before your clients can use it.
Disabling a service
Disabling a service makes it inaccessible to your clients until is is re-enabled. To disable a service, go to the Summary tab of your Consulting Dashboard, click the ellipsis (…) next to the service’s name, and click Disable Service.

Once a Service is disabled, it will display as Inactive.

To re-enable a service, click the elipsis (…) and click Activate Service.

Deleting a service
To delete a service, go to the Summary tab of your Consulting Dashboard, click the ellipsis (…) next to the service’s name, and click Delete Service.
