Customizing call availability is one of the great time-management features of the urLive platform.
You decide when to accept calls. Create blocks of time that others can see and use to book a call time that works for you.
Understanding the Availability page
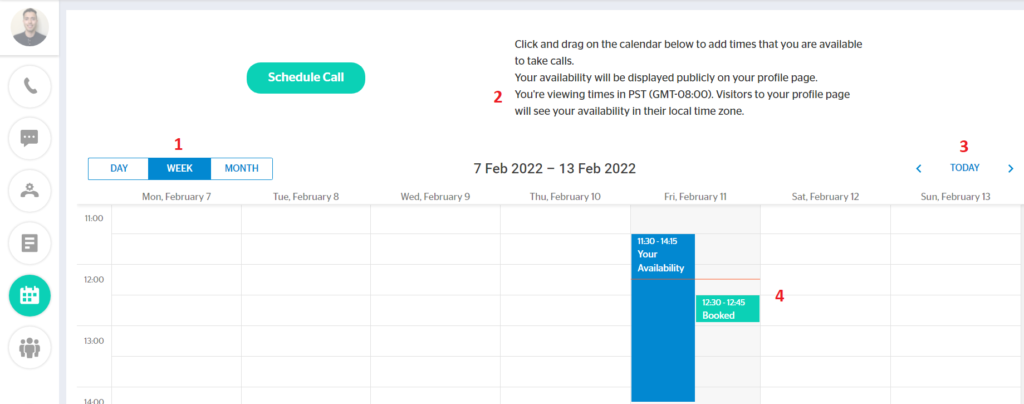
On the main dashboard, click the Availability Manager icon. The Availability page has four key sections.

- Change the calendar display – day, week, or month.
- The page displays the time for your region.
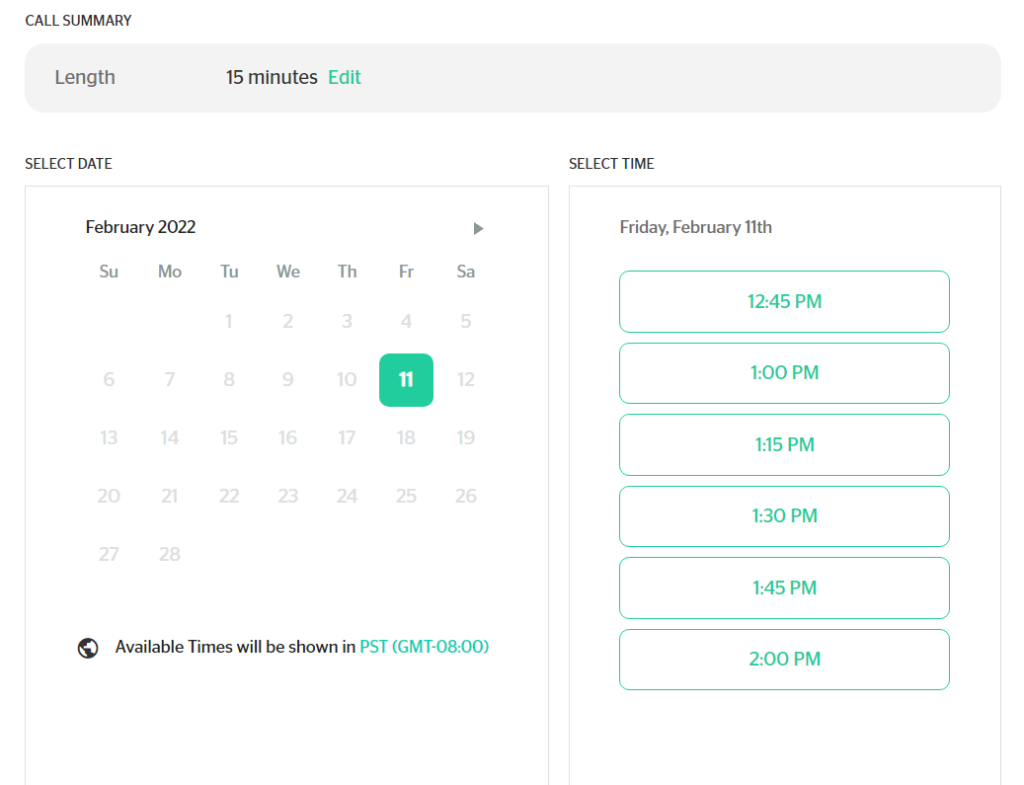
- When others book a call with you, their page displays time converted to their region. This automatic conversion avoids errors caused by time zone miscalculations and uncertainty about daylight saving and standard times.
- Select the day of the week.
- View booked calls on the calendar.
Creating blocks of availability
There are three ways to create a block of available call time.
- Click a block and drag the mouse down to add time. Drag the tab to adjust the size of the block and make changes in 15-minute increments.
- Double-click any spot on the calendar to create a 15-minute block of time.
- Double-click any block to open the editor. You can change the start and finish times as well as the date. You can also delete a block inside the panel.
Using the toolbar
Each block of time comes with a toolbar. Click a block one time to open the toolbar.
- Click the keyboard to open the edit panel.
- Click the trash can to delete the block.
Viewing your schedule
The caller’s perspective
This is how others see your availability (for a specific day).

Your view
Free blocks of time are blue. Green blocks show scheduled calls.
To see call details:
- Click a green block one time and then click the keyboard icon one time. The call status panel displays.

- To see who is on the call, click PARTICIPANTS.
