Create a urLive account by going to https://url.live/Account/RegisterUsername if you do not already have an account. To access this plugin, you will need a urLive account.
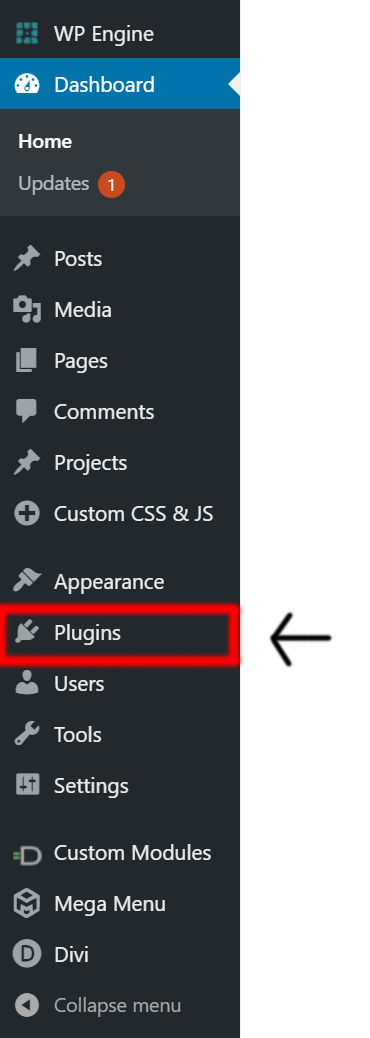
The first step is to go-to your WPAdmin dashboard, where you would click ‘Plugins’ in the menu on the left-hand side. Click on the ‘Add New’ button when on the Plugins page.
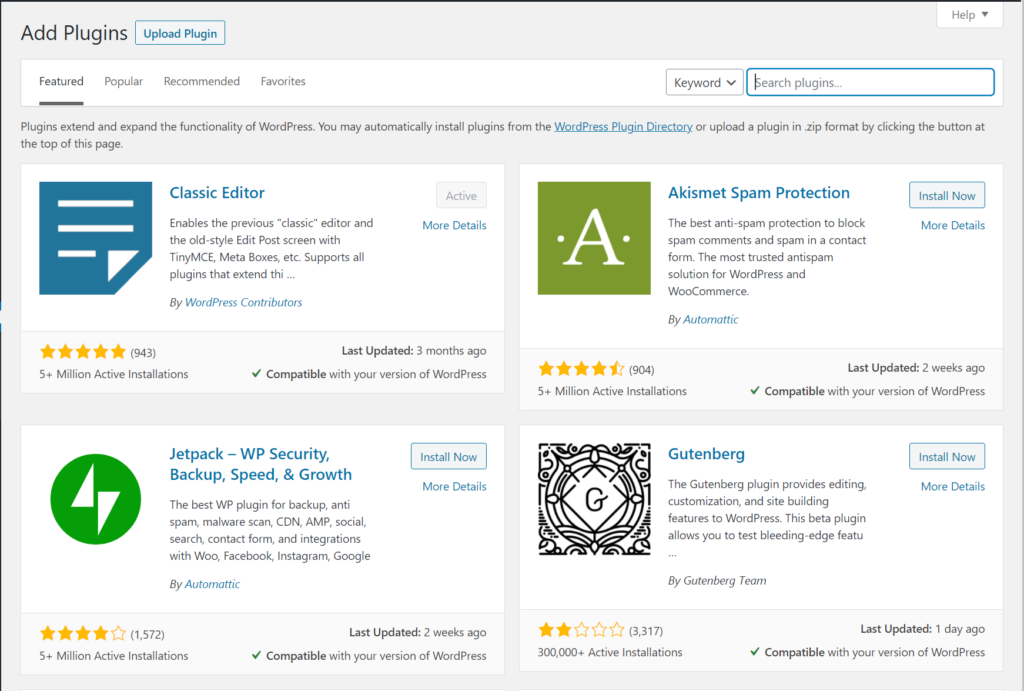
You will see a screen like the one in the screenshot to the right. Find the plugin by typing ‘urlive chat widget’ in the search bar. Once you have found the right plugin, click ‘Install Now.’ Once the plugin is installed, you want to click on the ‘Activate’ button.
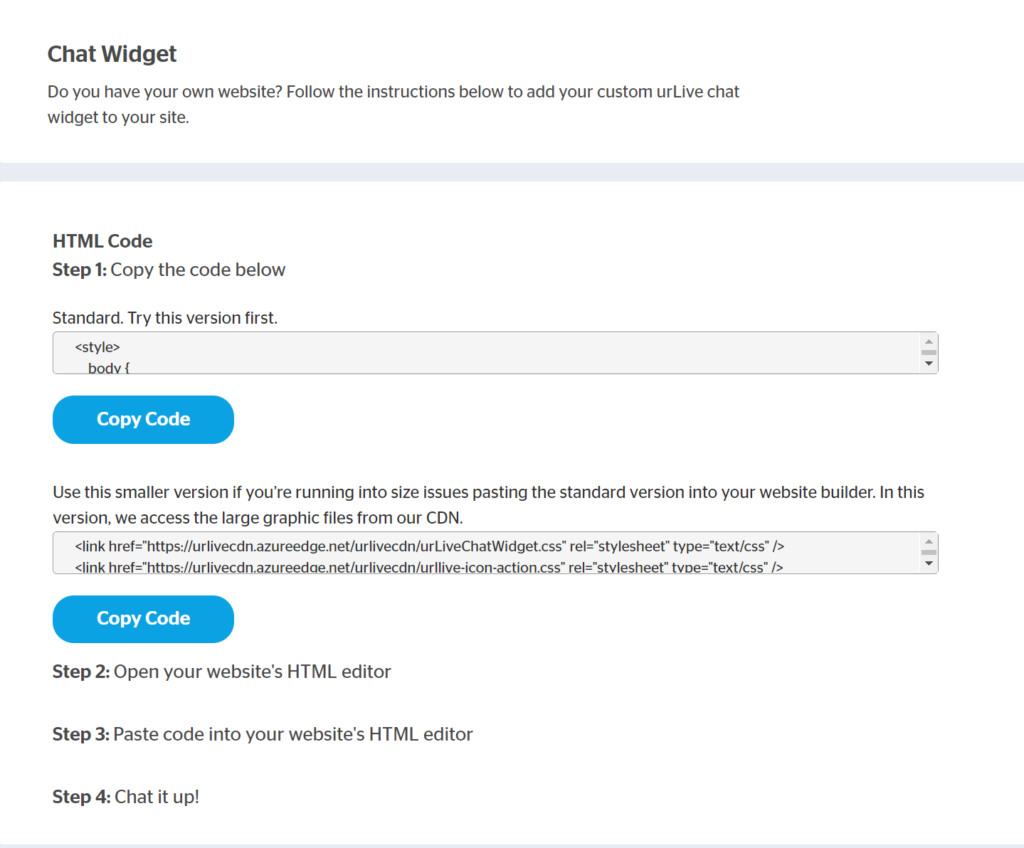
Congratulations, you have now installed and activated your urLive plugin. Now, please ensure you have logged into your urLive account. Next, in your WordPress admin tab, go to ‘Settings’, and then click on ‘Urlive’. Now click on ‘Input Widget Code’, this will open a new tab on url.live where you can copy your widget code.
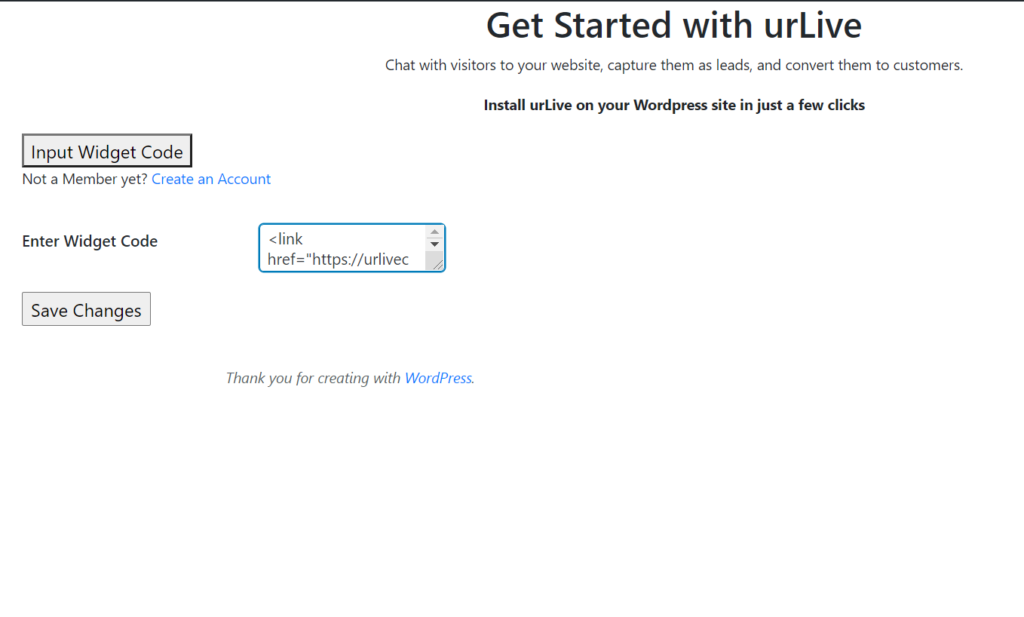
Go back to WordPress and paste the code in the text box, click ‘Save Changes’. Once saved, the new header should show you what urLive account is linked to your widget. The header will read ”Success! Your Widget is now Linked to url.live/’Your Account Name’.
Check your page on the WordPress dasboard to view the widget. Now visitors can instantly contact you through url.live.